Acne, age spots and hyperpigmentation and dark circles are normal part of life and having skin, and they’re nothing to be ashamed of. But for when you’re looking for even-toned, flawless coverage, the right concealer can feel like a magic wand that can cancel out discoloration and glide over uneven texture.
Concealers come in a myriad of consistencies, forms and finishes, from liquid to cream to stick and beyond. The key is to find the right formula and tone for whatever issue you’re trying to hide. Here are all the makeup tips and tricks you need to know to make your concealer look flawless:
1. First, pick the right color concealer
Finding the right tone the right color for the task at hand is crucial. Here’s your cheat sheet:
Peach shades cancel out blueish undereye circles and dark spots from sun or aging.Green tones hide red blemishes — follow up with a concealer that matches your skin tone exactly (or close to!).Yellow-toned concealers help to correct uneven skin tone from redness or hyperpigmentation.
2. Choose the right formula for the job
Not all forms of concealer are created equal. Pick from these options depending on what you’re trying to achieve:
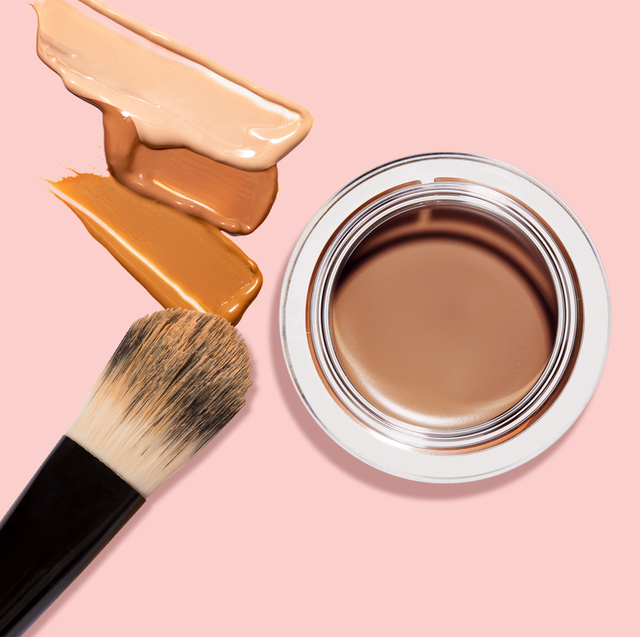
Crayons, sticks, or pencils are ideal for “precise application like a blemish or age spot” or scar, says makeup artist Erica Whelan. They often offer heavy coverage and require minimal blending when applied precisely, and are best suited for dry or combination skin, since “these formulas tend to be a little creamier,” says Joy Fennell, makeup artist and founder of The Joy in Beauty and All Black Everything Summit. Pots and creams are great for oily skin or tasks that require higher coverage. Cream concealers are thicker, therefore, they can be used to cover more [like] hyperpigmentation and other problem areas,” says Fennell. These also “tend to be the most versatile because you can always thin them down if need be with a little moisturizer,” she adds. Apply with a brush for maximum coverage or use your fingers for a more natural finish. Liquids: Suitable for all skin types, but particularly great for dry skin, a “liquid formula adds a level of hydration without making the skin look even drier,” says Fennell. From the tube, “apply directly to the skin and blend with your finger, sponge, or fluffy eye shadow brush,” says Whelan.
3. Apply your base products and foundation
Apply any moisturizer, primer and foundation reaching for concealer. If you apply your foundation first, you’re blurring the look of imperfections and likely won’t need to use as much concealer. If you don’t use foundation at all and just spot-conceal, be sure to hydrate your skin first!
4. Brighten dark circles and undereye discoloration
Undereye circles can be a telltale sign of a long night or lack of sleep, but discoloration under the eyes is also genetic. If you want to brighten your dark circles, here’s how:
Formula: “Look for concealers that have radiant or luminizing formulas,” says Whelan. Our experts prefer liquid formulas for the thin skin around the eyes, since creams and thicker formulas can settle into fine lines and wrinkles.Shade: You’ll want to opt for a color that’s a shade lighter than your natural skin tone. “This will brighten up the undereye area and disguise the dark circles,” Whelan says. Application: Draw a triangle to cover undereye circles instead of sweeping over the discoloration in a semi-circle shape. Rather than simply coloring over the circles directly under your eyes, this triangle shape highlights the front area of your face, making your face look youthful by creating a lifted the illusion. For best results, “dot the concealer under the eye and tap the product into place with your ring finger or a small fluffy eye shadow brush,” says Whelan.
5. Disguise puffy eyes
While makeup can’t change form, it create illusions to distract from any features you want to hide (or accentuate — think contouring). Here’s exactly how to brighten puffy undereyes:
Formula: Liquids are “great to use if you need to brighten an area,” says Fennell.Shade: Choose a tone that’s 1-2 shades lighter than your foundation.Application: “Add a highlighting concealer pen just above and below the area where the under eye is most puffy,” says Whelan. “By adding light to those areas, it makes those areas more noticeable and makes the puffiness look less noticeable.”
6. Cover up blemishes and acne
If you’ve already addressed acne with your skincare routine but are looking to hide any bumps or redness in the interim, here’s the foolproof guide:
Formula: “Choose a heavier cream formula like a stick concealer,” advises Whelan. Denser cream formulas are designed to stay put on a spot.Shade: A green- or yellow-tinted formula will help neutralize the redness of the spot. Top with a creamy concealer that closely matches your skin tone.Application: To target the blemish, Whelan suggests applying with “a fine pointed brush to place the concealer exactly where you want it to go. Gently blend the edges of the concealer with a brush, edge of sponge, or finger to blend into the skin for a seamless blend.”
7. Camouflage dark spots
Whether it’s from sun or age, dark spots on the face are extremely common. Here’s how to cover them:
Formula: “Choose a heavier cream formula to cover sun/age spots,” says Whelan. “Pots and creams are a heavier coverage and they tend to stay in place after setting them with powder,” says Fennell. The formula should be dense enough to fully camouflage the darkness.Shade: “Normally you can choose a concealer shade that matches your foundation color,” says Whelan, but if your spots are highly pigmented, a peach undertone will neutralize the dark brown cast.Application: “Apply foundation first to even out the skin tone, then apply concealer to the spot for maximum coverage,” says Whelan. “If you are trying to tone down dryness, make sure to use a hydrating formula and not a matte one,” says Fennell.
8. Expertly cover up scars
If you have any scars or hyperpigmentation you’re looking to obscure (on your face or otherwise), try these expert tips:
Formula: For a small scar, Fennell says a crayon or pencil formula is great; for larger scars, reach for a pot concealer for the best coverage: “Liquid wouldn’t be a good choice because it moves around on the face and its formula isn’t heavy enough to conceal,” she says.Shade: Look for a color that matches the surrounding skin exactly for the most believable blend.
Application: If using a crayon, simply trace or fill in the mark with the fine point. For larger or darker scars, apply pot or cream concealer using a brush or your fingers.
9. Know how to use concealer on mature skin
Application tips change when you’re applying concealer on dry skin, or on top of wrinkles and fine lines. Keep these important tips in mind:
Formula: “Your skin will look unnatural if you try to mask the area with heavy concealers,” cautions Whelan. Instead, choose a medium coverage liquid concealer that won’t settle into fine lines or wrinkles.Shade: Shop undertones based on the area you’re looking to correct, whether dark spots, undereyes, or redness. A luminizing formula will reflect light and add a glow to the skin, but make sure it’s not entering shimmery territory, which will actually accentuate visible signs of aging.Application: Buff on with a small fluffy eyeshadow brush for a natural-looking finish. This will “minimize the flaws while still making your skin look as fresh and natural as possible,” says Whelan.
10. Set it to make it last
Prevent concealer from getting cakey or settling in the creases around your eyes by blotting the excess product after application. Split a tissue into two layers, and press one of the sheets against skin to remove excess oil or too-thick product.
“If you have oily skin, make sure you set [your concealer] with a powder to avoid it moving around,” says Fennell. Do so by “lightly tapping a loose translucent powder over the area,” says Whelan. “This helps the concealer stay in place throughout the day.”


